
Students and friends have asked about how I do the writing on my appliqué blocks. As promised, here are my recommendations and method, with lots of photos.


For fancy writing, I first make the design in Microsoft Word, and type out words in Kunstler Script Bold font, which most closely resembles the writing I have seen on antique quilts. Use a font size that you can actually write (not too small). Copy the words twice and print on paper. Cut out one copy of the words for tracing. Set aside the second copy for visual reference. HINT: Including a straight line or two will help with straight placement.
Did you think my writing was freehand? Sorry, my freehand writing will never be as pretty as Kunstler Script. If you do not have a computer, and are nervous about signing a block, write out your signature on paper first. You can make sure the writing fits the space or centers where you want it to be on your block. Then trace it as described below.
* Always practice on a sample of the same fabric.
* Fabric must be completely dry or the ink will bleed.
* A light box is indispensable for tracing.
I use Sakura Pigma® Micron® pens, which are permanent on fabric. Size 005 is best for very small, fine writing, but it must be used with a very light touch. Notice that there is a huge difference between 05 and 005 – Closeup below compares Size 005 at left, Size 05 at right.)


1. Place the block FACE DOWN on the light box.
2. Where the inking will be done, stabilize the BACK of the fabric, to help the pen move smoothly across the fabric, or the pen may catch on the threads as it moves. Transparent tape is easy to see through for tracing. Use clear packing tape for larger areas.

3. Turn on the lightbox. Place the printout FACE DOWN on the BACK of the block. Align the printout, and tape that down securely. I have used regular office tape on top of the packing tape (easy to adjust or move it if needed.)


4. Turn the block over FACE UP on the light box. Keep the second copy of words nearby for reference, so you can better see details of the letters.
5. Take your time. This is not a job to be rushed. Get comfortable, take a deep breath, and brace your hand on the lightbox. Use a very light, steady hand to write. Use the Pigma pen like a paintbrush, brushing the ink softly. Too much pressure can damage the pen’s fine point. Do not allow the pen to stay on one spot for very long, or the ink may blot as the fabric soaks up the ink.
6. Ink all the words as single strokes first. You can darken the downstrokes of letters or add details later, if desired. (Like salt in soup, ink is easy to add, nearly impossible to remove.)
7. Turn the lightbox on and off frequently to help you determine the effect, and the amount of ink or pressure desired.

8. Last step, and VERY important – REMOVE all the tape before ironing or wetting the block! NEVER leave any tape on fabric long term.

Allow the ink to dry completely, 24-48 hours, before wetting the block.
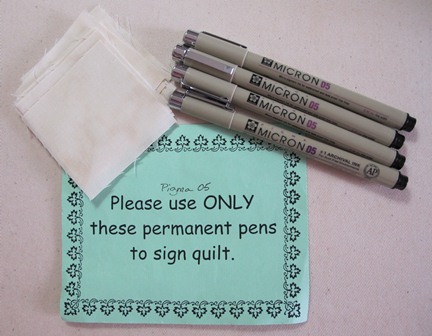
Signing blocks for a signature quilt. Size 05 Pigma pen is best when many people will sign freehand on fabric. Provide them with sample fabrics (with tape on back) to practice. Don’t let them use regular ink pens! Bellwether Dry Goods makes signature quilts for weddings, and they provide this little sign with the pens:
Years ago, I learned inking techniques in classes with Susan McKelvey. Her books are out of print, but you can still find them. Also find more information and inking techniques in books by Elly Sienkiewicz, including alphabets, phrases and fancy Victorian words to trace.
Inking can be used to trace images from calligraphy books, engravings, graphics, even trace from your photos onto fabric. Embellish your appliqué with inking – Pigma pens are available in lots of colors. Label your quilts! I could go on and on about inking – I’ve done lots of different things with Pigma pens. But this post is already too long.
See more inking tips here: Inking and Signing on Fabric - Continued
See more inking tips here: Inking and Signing on Fabric - Continued
‘Til next time, Keep Stitching!
Barbara M. Burnham
(c) 2013 Barbara M. Burnham. All rights reserved. Reproduction of any kind is expressly prohibited without prior written authorization.
(c) 2013 Barbara M. Burnham. All rights reserved. Reproduction of any kind is expressly prohibited without prior written authorization.
Very helpful, thank you for sharing!
ReplyDeleteThanks for this post. It's very timely for me.
ReplyDeleteExcellent tutorial! Thanks for taking the time to post.
ReplyDeleteBest stitches,
Mercy in Miami
High praise coming from you Mercy! Thank you.
DeleteI can't wait to try this. Thanks for sharing your knowledge.
ReplyDeletePractice on a sample - you will see how easy it is!
DeleteExcellent post! Thank you!!
ReplyDeleteI have always used freezer paper to stabilize while writing but I really like the idea of tape - no ironing! Don't you love when quilters share. There is always some new trick to learn.
ReplyDeleteGlenda, I learned with freezer paper too. But it is more difficult to see through for tracing than clear tape.
DeleteExcellent post, Barbara.
ReplyDeleteFantastic presentation on matters relating to proper cursive!
ReplyDelete